Wednesday, 23 December 2020

Lidded Pyramid Box Using In the Pines Stamp Set


It's almost Christmas, so time for my final Christmas table favour of the series! This time I've taken inspiration from a very similar origami box I've seen, but this one doesn't use origami! 

It's a 2 part box - a small sloping sided box to put some goodies in, and a pyramid lid. I designed the box & then realised that it was the perfect size for the larger tree from the In the Pines stamps, so I've stamped & heat embossed one on each side. 

If you prefer, you could make it out of DSP, as it just takes 2 pieces of 6" x 6" paper. I've also made some from the lovely Feels Like Frost papers, although in the example below, I used more strands of ribbon!
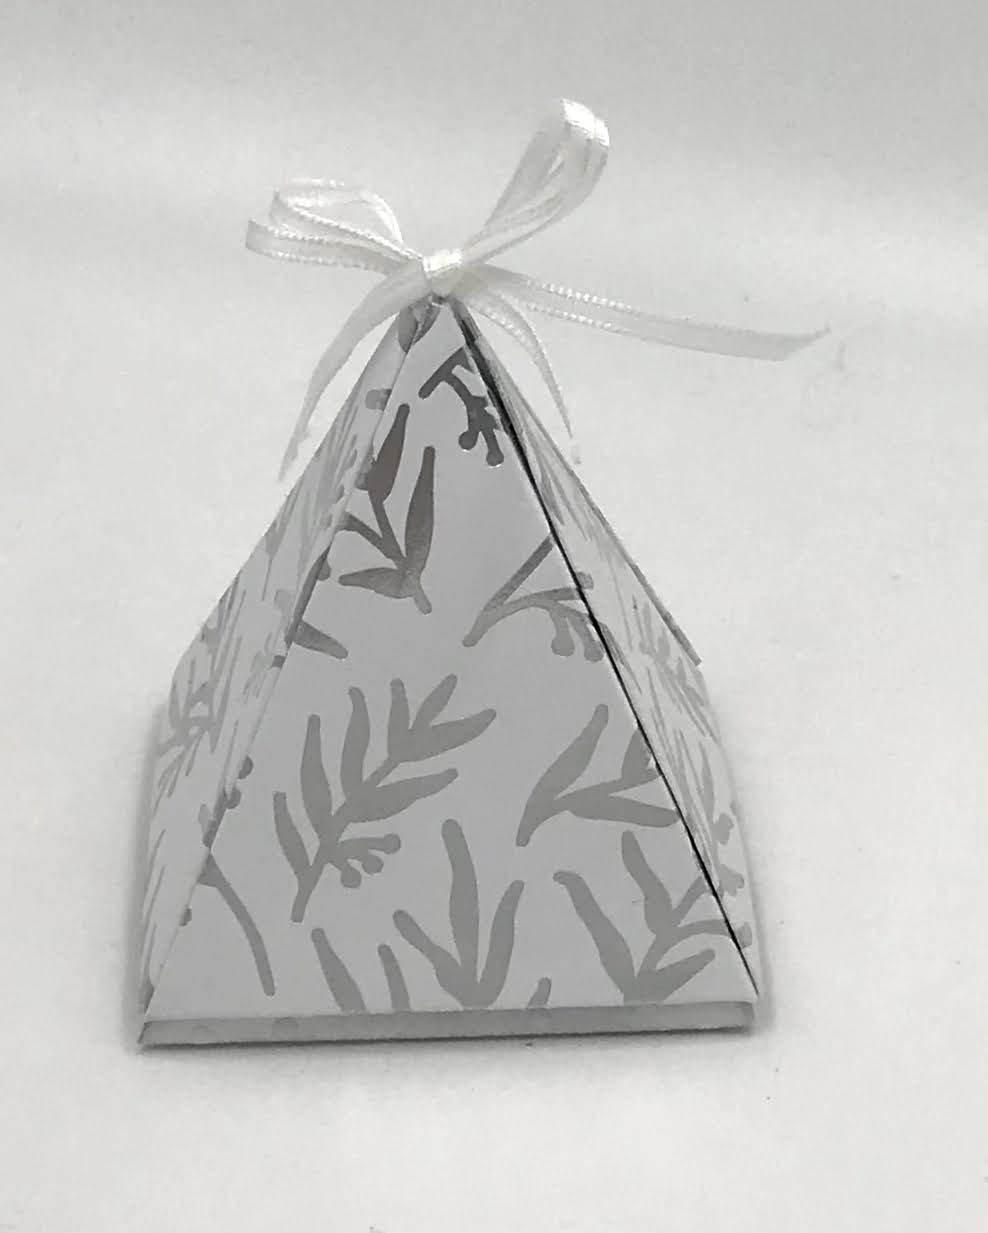


Hope you like it!

Thanks for stopping by

Jane x


Instructions:


Base


6”x 6” paper


On all 4 sides, Score @  7/8”, 1 3/4” & mark @ 2 1/2”, 3 1/2”


Score lines from each corner of the centre square to each of the 2 closest marks. as in 1st diagram below  


Remove sections as in 2nd diagram.


Adhere tabs, noting that the slides should slope in.


Fold over & adhere 2 adjacent flaps


Position approx 15-18” twine or ribbon so that the centre is between the 2 flaps that haven’t been glued down.


Fold over & adhere the flaps so that ribbon is held under the flaps, with the loose ends coming out of 2 opposite corners. 


LID


Score on wrong side @ 3”. Turn 90° & repeat.


Turn to right side & mark @ 1 3/4”, 4 1/4” on all 4 sides


Score across the corners from mark to mark as in 1st diagram.  


Now score lines across from each end of each of those score lines to the opposite end of the score line diagonally opposite, as in the 2nd diagram.


Assemble as instructed in the video. 

Thursday, 3 December 2020

Christmas table favour #5 Pyramid Box Using Feels Like Frost DSP


This fun little box is the latest in my series of Christmas table favours and is about the right size for a chocolate!

I got the idea from a similar shaped box I saw that Mitosu Crafts had made, although they made theirs in a different way from mine!

For this one, I've used the Beautiful Feels Like Frost paper, and a piece of our Whisper White crinkled seam binding ribbon.

Hope you like it

Thanks for stopping by

Jane x


Instructions:

4” x 4” DSP or other square piece of DSP (works best in multiples of 1"/4cm)


Mark each side at 3/8 of the way from each end for this example that is 1 1/2", 4 1/2”


Score diagonal lines from the LH mark on one side to the RH one on the next side clockwise.


Repeat for all sides


Score diagonal lines from each corner of resultant centre square to each of the adjacent corners of the paper


Cut away the triangles marked on the template


Fold & burnish


Punch a hole in each point & use ribbon to close


Monday, 30 November 2020

Christmas Cracker for a Lipstick using Feels Like Frost DSP


I've been teaching my zoom class a selection of Christmas table favours recently. Nothing says Christmas table more than a Christmas cracker!

The cracker I taught them uses a piece of 6" x 6" DSP (Designer series paper) and would fit a couple of chocolates inside, I'll give you the instructions for that one below. 

As one of my class wanted to gift some lipsticks, I've designed this cracker to perfectly fit a lipstick. It uses 4" x 6" DSP,  so you'd get 6 out of a piece of 12" paper! 

For this one I've used the beautiful Feels Like Frost DSP & tied it with some of our Seaside Spray Metallic Ribbon.

Hope you like it

Thanks for stopping by

Jane x


Measurements:

For the Lipstick Sized Version:


Start with 4" x 6" (10.2cm x 15cm)

Score Short side @ 7/8", 1 3/4", 2 5/8" 3 1/2" (2.3, 4.6, 6.9, 9.2cm)

& on the long side @ 3/4", 1 1/2", 4 1/2", 5 1/4" (1.7, 3.5, 11.5, 13.3cm)

Flip top to bottom & score @ 1 1/8", 4 7/8" (2.6, 12.4cm)


For the Chocolates sized version:


Start with 6” x 6” ( if using metric trim to 15 x 15.2cm)

Score (LS) @ 1 3/8”, 2 3/4”, 4 1/8”, 5 1/2” (3. 5,7, 10.5, 14cm)

Turn 90° & score @ 1”, 2”, 4”,5” (2.5, 5, 10, 12.5cm)

Flip top to bottom & score at 1 1/2”, 4.5” (3.75, 11.25cm)


Alternatively, To make numbers easier in metric trim to 14 x 15.2cm

Score LS @ 3. 5, 7, 10.5, 14cm

Turn 90° & score @ 3, 5, 9, 11cm 

Flip top to bottom & score at 4, 10cm


Thursday, 26 November 2020

Christmas Table Favour #3 Hexagonal Twist Close Box


 One of the lovely things about being a Stampin' Up! demonstrator is sharing ideas & inspiration with fellow demonstrators. In a recent zoom meeting one of my friends & fellow demonstrator showed us a beautiful box she'd made. You can see her video here

As soon as I saw her box, I knew a smaller version would make a lovely table favour. So I've designed this one, which is just the right size for a Lindor chocolate. Yummy!

Hope you like it

Thanks for stopping by

Jane x


Instructions:


Start with 4 7/8” x 3 3/8” (13 x 8.8cm)


Score on LS @ 3/4”, 1 1/2”, 2 1/4”, 3”      , 3 3/4”, 4 1/2” (2,4,6,8,10,12cm)

        & mark @ 3/8”, 1 1/8”, 1 7/8”, 2 5/8”, 3 3/8”, 4 1/8” (1 ,3,5,7,9 ,11cm)


Turn 90ยบ so that the narrow section is at the bottom & score @ 1 5/16”, 2 11/16” (3.5,7cm)


On reverse side, Score diagonal lines from the mark to the bottom LH corner of each rectangle that makes up lid.


Fold & burnish all score lines.


Round lid corners (optional).


Monday, 23 November 2020

Christmas Bauble Using Feels Like Frost DSP


I've been asked recently to do a video for this lovely Christmas Bauble. I first saw how to make these on a video from a German Stampin' Up! demonstrator, Jana Muller. Although her video is in German, I managed to follow how she was making them.

For my version I thought I'd make a slightly smaller version, using Feels Like Frost 6" x 6" paper. I'll include the measurements for the larger version, as well as my smaller version, below. The method of putting it together is exactly the same whichever size you choose to make, although you'll need a slightly larger circle to score around, for the larger version. 


Hope you like it

Thanks for stopping by

Jane x


Instructions:

For the smaller bauble, start with a piece of DSP measuring 6" x 3 3/8"(15.2 x 9cm)

Score on the long side @ 1/2", 2 1/8", 3 1/4", 4 7/8", 5 1/2" (1.5, 5.7, 8.7, 12.9, 14.4cm)

Cut into 3 strips each measuring 6" x 1 1/8" (15.2 x 3cm)

Use a circle measuring approx 2 1/8" (5.4cm) as a guide for scoring the arcs. eg 2nd smallest stitched circle die or the 4th smallest layering circles die.


For the larger bauble, start with a piece of DSP measuring 8 1/4" x 4 1/2"(21 x 12cm)

Score on the long side @ 3/4", 3", 4 1/2", 6 3/4", 7 1/2" (2, 7.5, 11.5, 17,19cm)

Cut into 3 strips each measuring 8 1/4" x 1 1/2" (21 x 4cm)

Use a circle measuring approx 2 5/8" (6.7cm) as a guide for scoring the arcs. eg 2nd largest stitched circle die or the 3rd largest layering circles die.


Sunday, 22 November 2020

German Bell Christmas Decoration Using Classic Christmas DSP


For me, personalised Christmas decorations & cards mean so much more than shop bought ones! Handmade Christmas cards always get pride of place, and our tree has loads of handmade decorations, with my personal favourites being some my sister made for me many years ago!

So when I saw these German Bell decorations a few years ago, I knew I had to make some! This is one of the first ones I made.

So this year I thought I'd make some slightly smaller ones, using the Classic Christmas DSP & our Jingle Bells embellishments. They are fairly simple to make, and the only extras you'll need are some adhesive & some twine to hang them on your tree! 


Hope you like them!

Thanks for stopping by

Jane xx


Thursday, 5 November 2020

Faceted Self Closing Pouch using Feels Like Frost DSP


Ever have one of those days?! Well I had one of them when I tried to video the instructions for this lovely faceted pouch! But every cloud has a silver lining, so taking 4 attempts to video this, means I have 4 examples of different sized pouches to show you! 

They are all made exactly the same way, and all the instructions are exactly the same, with just one exception - the size of the piece of paper you start with! 

I've used the beautiful Feels Like Frost 6"x6" Papers, in the video - I accidentally called it First Frost in the video, but didn't want to record it again, just for that mistake! 

For the tallest of the examples in the picture, I used Snowflake Splendor DSP as this one needed a larger piece!

Hope you like them

Thanks for stopping by

Jane x


Instructions:

Start with a piece of DSP 6" (15.2cm) wide.

The height of your DSP will depend on the size of pouch you want to make. For the examples in the picture, I've used DSP of height 4" (10cm), 5" (12.5cm), 6" (15.2 cm) & 7 1/2" (19cm)

Score @ 7/8" (2cm) from the top of your piece of paper.

Turn 180° & score @ 1 3/8" (3.5cm) from the bottom

Turn 90° so that the narrower section is at the top and score @ 2 3/4", 5 1/2" (7,14cm)

Turn 180° and score @ 1 7/8", 4 5/8" (4.5, 11.5cm) to first score line only

Now with short score lines at the bottom, score diagonally from each of the short score lines to the top corners of the panel above.

Cut up all 4 score lines in bottom section & remove section marked on template.

Fold & burnish all score lines.

Adhere tab to other end, round top corners & punch hole for ribbon

Fold in all 4 tabs at bottom, forming a square bottom & adhere.